Do you think, having amazing products in your Woocommerce store is enough to get them noticed on Google Shopping?
Then, you’re so wrong.
Just having great products is never enough. In today’s competitive world, even the most great offers can disappear into Google Shopping ads without proper feed management.
The reality is that a staggering 80% of Google Shopping ads fail to convert only for poorly managed data feeds.
And the result?
It’ll increase visibility, clicks, and ultimately, sales for your store.
In this blog, I’m going discuss each detail of the Google Shopping feed management. I’ll explore everything from manual feed creation to automated solutions, along with valuable tips to optimize your data for maximum impact.
What is Google Shopping Feed Management?
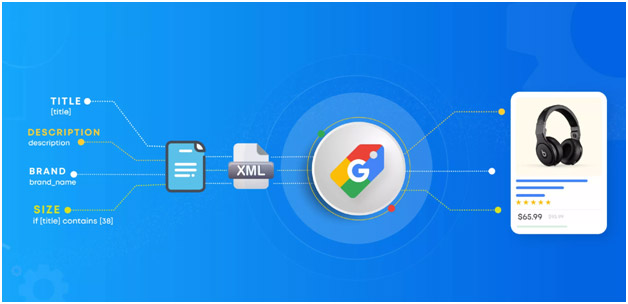
Google Shopping Feed Management is like having a personal shopping assistant for your online store. It’s all about generating your product feed with precision to ensure every detail, from titles and descriptions to images and prices.
But here’s the best part!
It’s not just about creating great listings; it’s an ongoing process that keeps your products at the top of search results and in front of eager shoppers.
How To Manage A Google Shopping Product Feed For Woocommerce Manually?
Managing a Google Shopping product feed for WooCommerce on your own is definitely possible, but it does take some effort. Here’s a simple guide to help you:
1. Set Up Your Spreadsheet
First, you need to create a new spreadsheet using Google Sheets, Microsoft Excel, or any other program you like. Then, add the required column headers such as product title, description, price, image URL, and unique identifiers (like GTIN or MPN). You can find the full list of these details on the Google Merchant Center.
2. Enter Your Product Information
Next, you’ve to enter the details for each product. Carefully add the title, description, price, image URL, and any unique identifiers into the appropriate columns.
3. Format and Optimize the product data
Finally, make sure your data meets Google’s formatting guidelines. Since you’re doing this manually, you’ll need to spend a bit of extra time on optimization.
4. Upload and update the product feed
Once your spreadsheet is ready, you’ll need to upload it to your Google Merchant Center account. Google offers options for uploading through their interface or scheduled fetches from your server.
How To Manage A Google Shopping Product Feed Using Plugin?
Managing your Google Shopping feed with a plugin streamlines the process. Plugins automate updates, enable bulk edits, and offer error checking. This saves you time, ensures accuracy, and gives you more control over your product data. Pair this strategy with Google review management to enhance your brand’s visibility and reputation, creating a seamless experience for both your customers and your business.
Here, you’ll have several feed management tools available to manage your Google shopping product feed with full automation.
Let me suggest one of the best free plugins, Woocommerce product feed manager plugin – CTX Feed. CTX Feed offers a feature-rich solution specifically designed to simplify Google Shopping product feed management for WooCommerce stores.
But, “Why CTX Feed?”
CTX Feed is a powerful plugin designed by Webappick- A trusted Software Company to simplify Google Shopping feed management for WooCommerce stores.
Well, check out the compelling features of CTX Feed that make it the top choice for every Woocommerce owner.
- It simplifies the feed creation process with pre-configured templates and automatic updates.
- Its intelligent features like automatic recognition and comprehensive attribute mapping ensure accurate product listings.
- CTX Feed also offers advanced optimization, analytics integration, and multilingual support to enhance your product visibility and reach.
- With robust error detection and multi-channel capabilities, CTX Feed is a valuable tool to boost your online sales.
Now, to get CTX Feed, simply install the freemium plugin in your WordPress plugin panel.
Once you’ve install and activate the plugin, you need to first create a product feed. Creating a product feed using CTX feed is a real breeze. It includes the following steps:
Step 1: Go to CTX Feed from the left panel and click on the the Feed Menu.
Step 2: A new tab “content settings” will appear. Choose your country accordingly.
CTX feed offers you more than 130+ pre-made templates. So, from the Templates drop-down menu, choose Google Shopping.
Again, choose your preferred file (XML) from the File Type menu.
Step 3: The plugin will effortlessly generate the required attributes below. There, you’re free to customize or add attribute fields as needed.
Once you’re done, just click the generate button to produce the feed.
And you’re done. CTX Feed saves you time by automatically generating your feed file with your product information, based on relevant attributes.
Here are some bonus settings you can adjust to manage your google shopping feed in a more customized way.
Include additional attribute
To include additional attributes in the feed, simply click the (+) icon next to the attributes. This action will generate a new blank attribute for you to fill in.
Avoid confusing your customers with outdated prices! Setting the sale expiration date accurately is crucial to maintaining trust. Simply choose the “sale price effective date” attribute from the CTX Feed dropdown menu.
In the Value dropdown, you can assign existing values already set on your product pages. For example, selecting “Product Title” from the dropdown will prompt the plugin to automatically gather titles from your product pages.
Applying different filters
CTX Feed lets you filter your product selection based on various criteria:
- Include specific products: Create feeds for individual products, categories, or based on shipping/tax locations.
- Exclude unwanted products: Filter out hidden items, incomplete descriptions, or out-of-stock products (a must for maximizing ROI!).
- Customize campaign URLs: Add custom parameters for detailed campaign tracking.
By filtering your feed, you ensure only the most relevant and up-to-date products reach potential buyers, leading to a more effective Google Shopping presence.
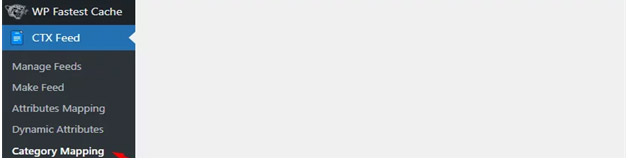
Mapping Google Shopping categories
Head over to CTX Feed >> Category Mapping and get started with a new mapping in just a few clicks.
Now, select “Google Shopping” from the “Merchant” dropdown.
CTX Feed automatically displays your store categories along with relevant Google Shopping categories.
Simply match your categories with the corresponding Google options for a streamlined mapping process.
Save your configuration, and you’re ready to go!
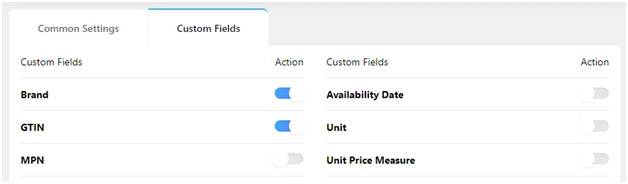
Adding GTIN and MPM fields
While other plugins might require technical knowledge to add these custom fields, CTX Feed makes it a breeze.
Head over to the CTX Feed settings and navigate to the “Custom Fields” tab.
Here’s the magic part.
CTX Feed already includes a comprehensive list of commonly used custom fields for various channels. Simply enable the ones you need with a single click.
CTX Feed simplifies brand management for your Google Shopping feed. Head over to Products >> Brands and start adding your brand names.
CTX Feed automatically takes care of including them in your feed file and ensure accurate product listings.
Now, here comes the main part, adjust Google Shopping feed management. A well-managed Google Shopping feed is the key to connecting with potential customers and converting them into loyal buyers.
CTX Feed lets you set automatic updates for your Google Shopping feed. Simply head over to “Manage Feeds” and choose your preferred update interval.
Within the feed settings, you have a range of options available to you. You can edit, delete, duplicate, or copy feed URLs as needed.
Additionally, you have the option to download feed files or export feed settings.
Also read: 5 Conversion Boosting Tips for Your WooCommerce Store
Google Shopping Feed Management Settings:
Now, it comes down in the settings of Google shopping feed management. Here, you can adjust all the settings to get a well-managed feed.
Connecting your CTX Feed to Google Merchant Center is simple. To connect your feed file to Google Merchant Center, follow these steps:
First, log in to your Google Merchant Center account. Then, navigate to the “Products” section.
Here you’ll get two options:
- Add another product source
- Add new products one by one
Generally, any woocommerce store has at least 100+ products. That’s why, adding new products one by one is next to impossible.
So, no matter how small your Woocommerce store is, go with Add another product source.
Now, you can upload your feed file in 3 different ways. I’ll suggest to go with Add products from a file. It’s because it’s the easiest and quickest process.
Simply add the link to your file. However, your file must be in one of the following formats like .gz, .txt, .xml, .zip, .bz2.
Now, Google Merchant Center will automatically pull your product information directly from the feed URL hosted on your WordPress site with CTX Feed.
But, if you want to make any changes, what to do then?
Well, no need to do manual updates.
CTX Feed automatically captures any changes you make to your WooCommerce product pages (descriptions, prices, etc.) and seamlessly reflects them in the feed file. You’re also in control of the update frequency.
Wrap Up
Mastering Google Shopping feed management unlocks a world of possibilities for your online store. By keeping your feed accurate, optimized, and up-to-date, you can ensure your products appear in relevant searches. It eventually attracts more clicks, and ultimately converts more browsers into buyers. Remember, a well-managed feed is the foundation for a successful Google Shopping campaign.